


Combination sauna preparation: Get everything ready
Good preparation helps ensure that the assembly of your combination sauna goes smoothly. By preparing the room, flooring, access routes and electrical connections in advance, you can avoid surprises during assembly.
As a combination sauna has both infrared heaters and a traditional sauna heater, it is important to check in advance which requirements apply to your chosen model. The required electrical connection can vary depending on the sauna and heater. Always check the product information and manual for your specific model before installation.
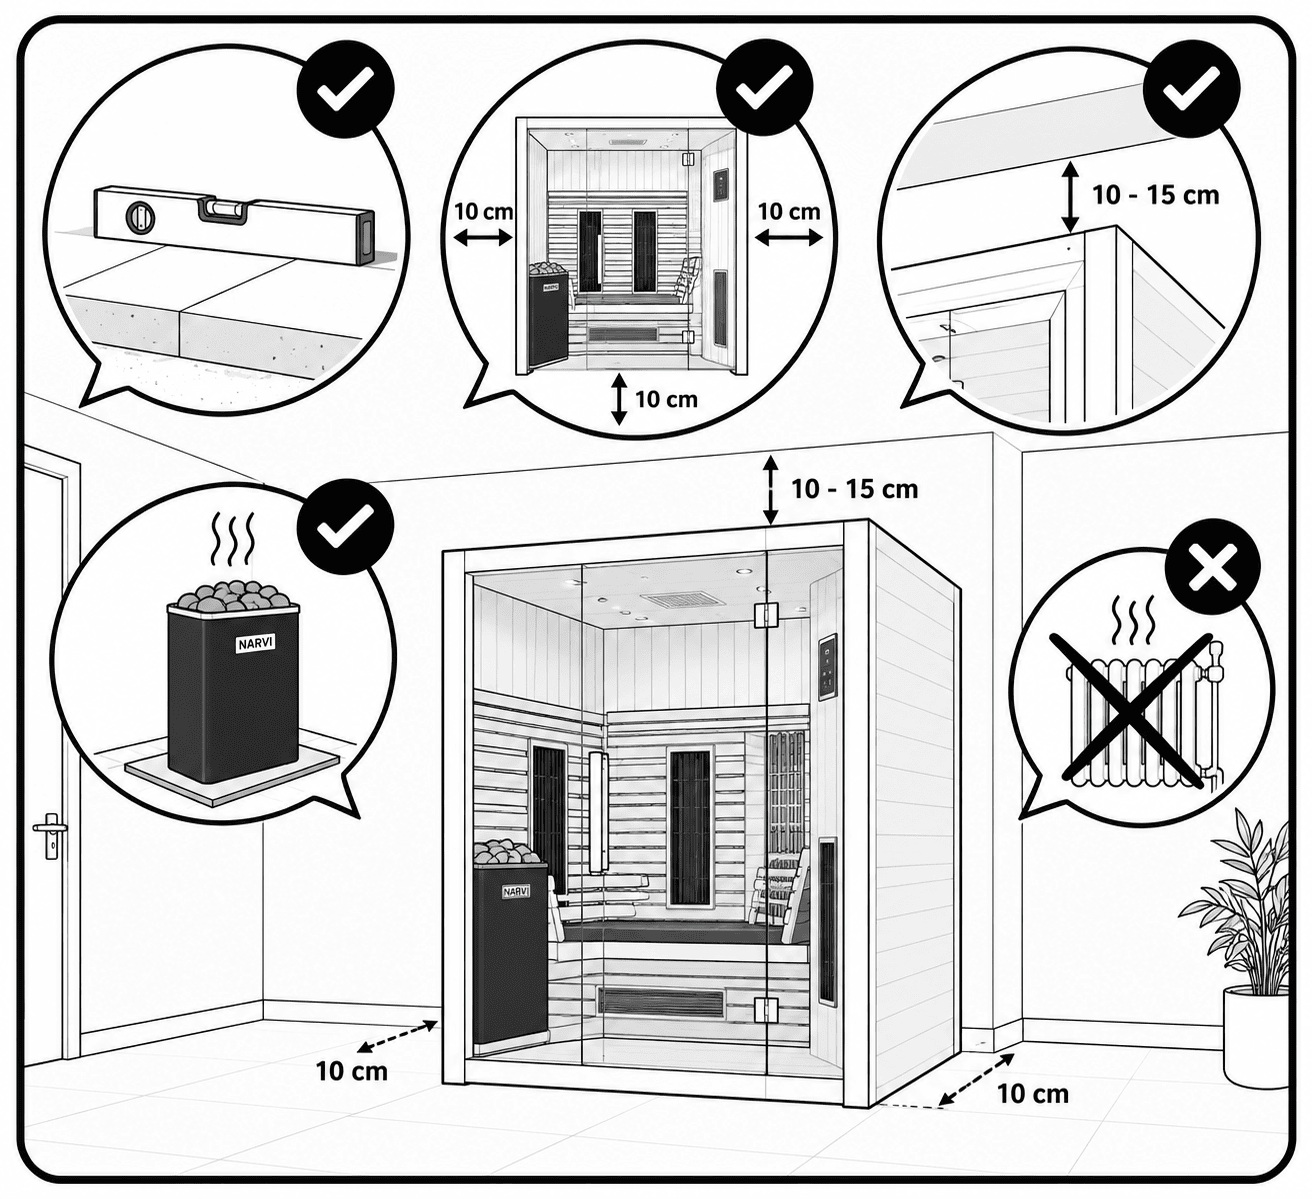
A solid foundation & space
Your combination sauna must be placed on a level, stable and dry surface. A good base ensures that the sauna cabin remains stable during assembly and that the different elements fit together correctly.
Allow at least 10 cm of free space at the sides and back of the sauna. This space is important for both ventilation and assembly. Also allow approximately 1.5 cm of clearance around the cabin.
Pay attention to the ceiling height as well. A minimum of 10 to 15 cm of free space is required between the top of the sauna and the ceiling for installing the roof panel and connecting the electronics.
Do not place the sauna directly against a heat source, such as a radiator.
If you use a floor grille instead of a solid base plate, the floor underneath the sauna heater must be suitable for the heat produced by the heater. Use a heat-resistant surface in accordance with the requirements of your chosen sauna heater.
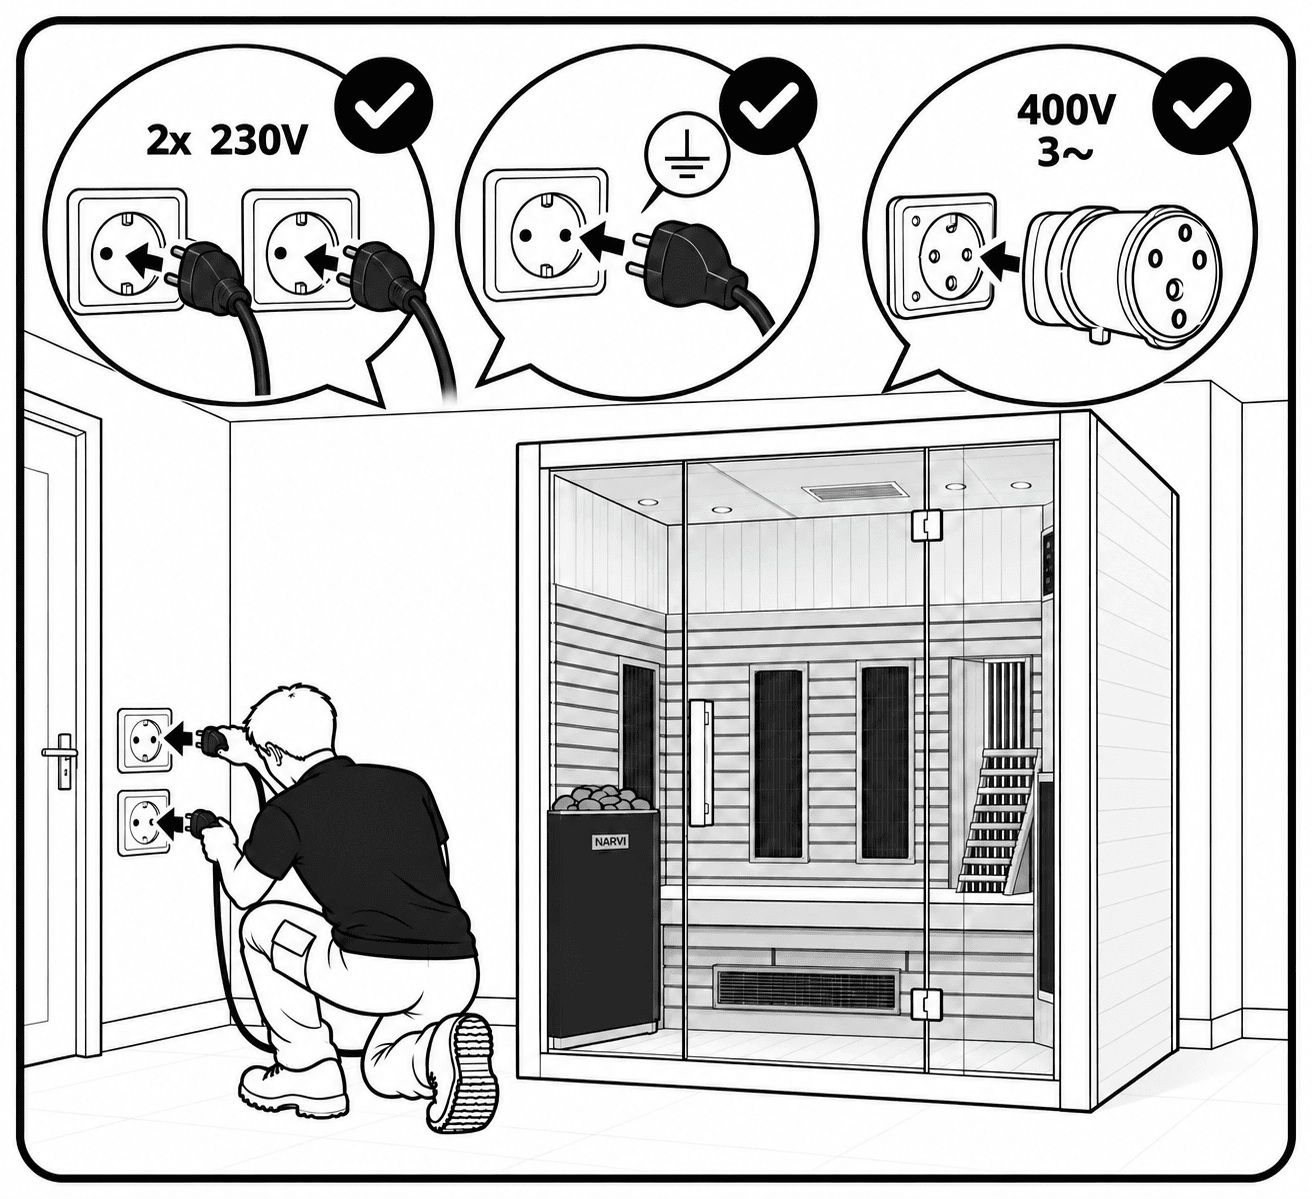
Your electrical connection
The electrical connection required depends on the combination sauna you choose and the power of the sauna heater. The range includes models with different electrical requirements.
For models with a 3.6 kW sauna heater, two 230 V connections are required. These should preferably be connected to separate circuits. The connection for the sauna heater must be earthed.
For models with a higher heater output, a 2-phase or 3-phase connection may be required. A 3-phase connection requires a 380 V supply. Such a connection must be installed by a qualified electrician.
Always check in advance which electrical connection is required for your chosen combination sauna. Make sure the required connections are available in the correct location before assembly begins.
UK-specific note: the UK SuperSauna range currently includes both 230 V and 380 V combination saunas. For example, some 3.6 kW models use 230 V, while larger models are offered with 4.5, 6 or 9 kW heaters at 380 V. The infrared system can also have its own 230 V connection. Therefore, keeping the advice to check the exact requirements of the chosen model is important.
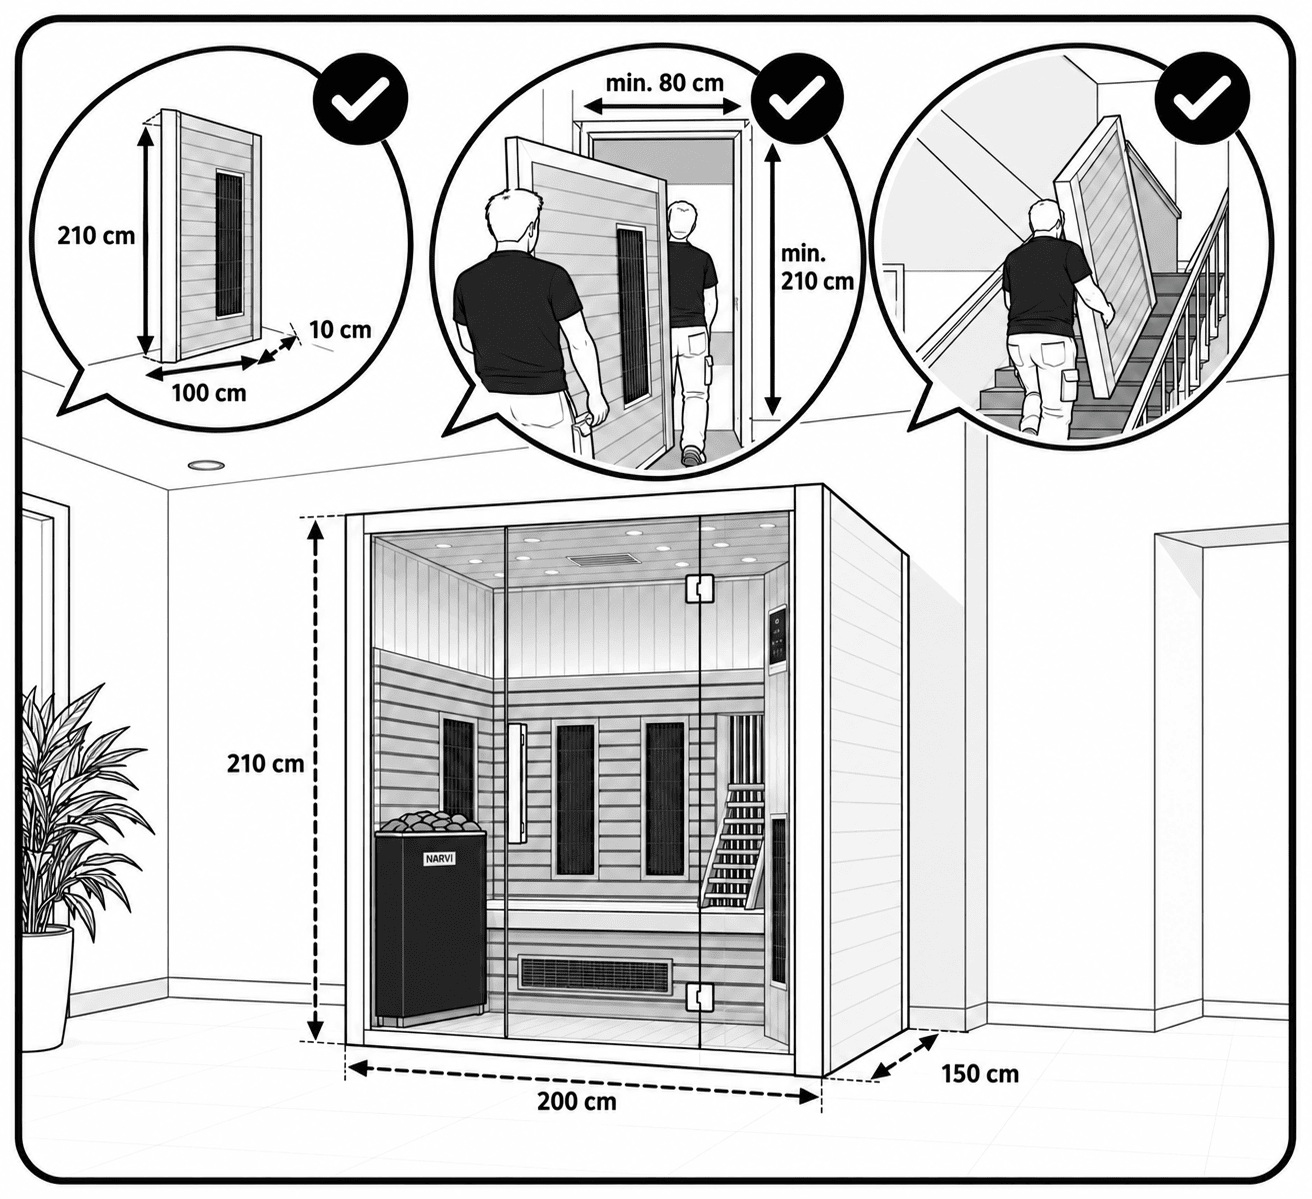
Sauna dimensions & access to the room
Check the external dimensions of your combination sauna in advance and make sure that the chosen room is large enough for the complete cabin.
Also take the dimensions of the individual panels into account. The dimensions of the largest panels may vary depending on the model. Therefore, check not only the space where the sauna will be installed, but also whether there is enough room to handle the different components during assembly.
Before the sauna is delivered, check whether the different components can fit through the available doors, hallways and other access routes. Pay particular attention to the dimensions of the largest panel of your chosen sauna. Check the height, width and depth of the components and take any stairs or other obstacles into account.
Does the sauna need to be taken to an upper floor? Make sure the route is completely clear beforehand and that the larger panels can be safely moved upstairs.
Assembly preparation
Before starting the assembly, make sure there is enough working space around the area where the sauna will be assembled. Clear the space of furniture and other obstacles so that the different panels and components can be placed safely.
Also make sure that stairs, hallways and other access routes are completely clear. If you need additional help to carry the panels to the assembly area, arrange this in advance.
The combination sauna is assembled from different panels and components. A clear and easily accessible workspace helps ensure that the assembly can be carried out smoothly.
Ready for assembly?
Before your combination sauna is delivered, check that:
- the surface is level, stable and dry;
- there is at least 10 cm of free space at the sides and back;
- there is enough space above the sauna to install the roof and connect the electronics;
- the dimensions of the sauna and the largest panels have been checked;
- all access routes and the route to the assembly area are clear;
- the correct electrical connection has been prepared;
- the required circuits are available;
- there is enough working space around the sauna;
- any additional help with lifting has been arranged in advance.
Good preparation ensures that the assembly can be carried out without unnecessary delays. The exact requirements may vary depending on the combination sauna. Always check the product information and assembly manual for your chosen model.
Still have questions?
If you still have questions after reading these preparation tips, please visit our knowledge base for a complete overview of all frequently asked questions.
Voorbereiding voor uw Combinatie sauna
Inprogress...
Voordat uw sauna geleverd wordt, kunt u onderstaande punten controleren en afvinken.
Stroomvoorziening
Er is een vrij stopcontact (230V) aanwezig. Liever geen verlengsnoer gebruiken - direct aansluiten is mogelijk. Indien de infrarood sauna te ver van het stopcontact staat, gebruik dan een kwalitatieve (dikke) goede verleng kabel .
Toegang tot de ruimte
De panelen passen door deur, trapgat (letop op grootste paneel) of gang.
Hoogte/breedte/diepte van de grootste panelen is vergeleken met de doorgangen.
Eventuele obstakels zijn weggehaald.
Plaats van de sauna
De sauna komt op een vlakke en stabiele ondergrond.
Er is minimaal 10 cm vrije ruimte aan de zijkanten/achterkant voor montage en ventilatie.
De plek is droog en goed geventileerd.
Niet naast een radiator of warmtebron.
Of: ik heb een speciaal buitenmodel besteld.
Overige aandachtspunten
Er is voldoende werkruimte voor de monteurs.
Trap of doorgang is vrijgemaakt.
Indien nodig: extra tilhulp geregeld of met ons besproken.