


Assembly of your combination sauna
A combination sauna is made up of various prefabricated elements. The assembly involves positioning and securing the different panels, followed by installing and connecting the technical and other components.
On this page, you will find practical information and important points for assembling your combination sauna yourself. The exact assembly process may vary depending on the model. Therefore, always use the assembly manual for your specific sauna as your main guide.
Assembling your combination sauna
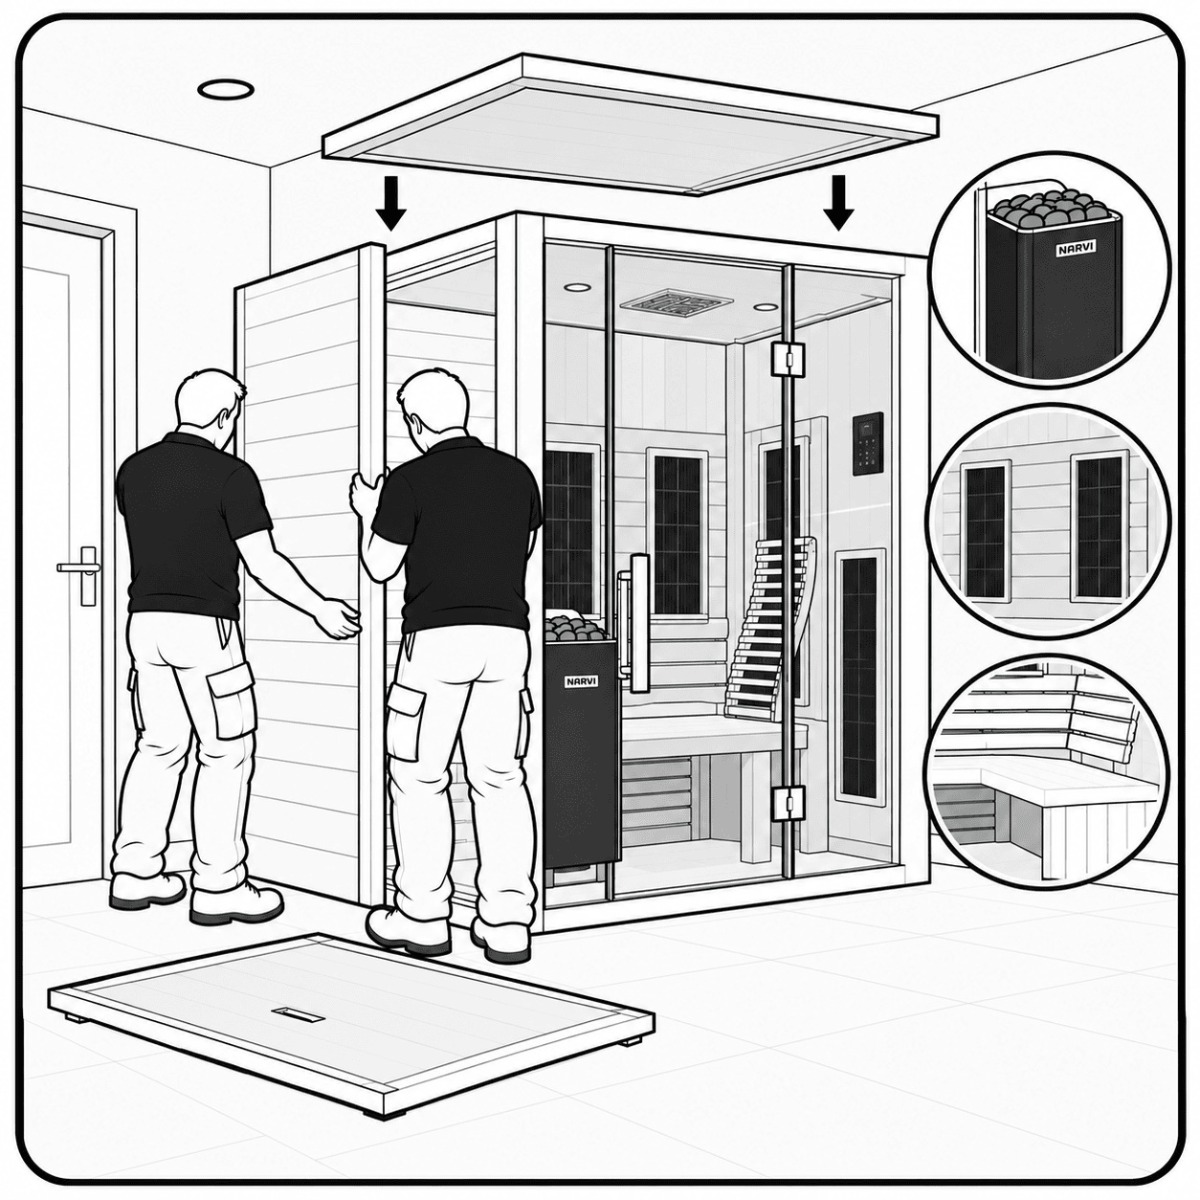
The assembly of a combination sauna starts with positioning the base plate and the different wall panels. The roof, door, benches and other components are then installed.
Always lift large and heavy panels with at least two people. This helps prevent damage to the cabin and makes moving the components safer.
Start the assembly with the base components and then work through the remaining steps one by one. Regularly check during assembly that the different panels fit together correctly and are positioned properly.
The supplied manual contains the exact assembly sequence for your combination sauna. The physical manual is included with your delivery and can usually be found in a box marked “Manual” or underneath the cover plate of the roof panel.
Connecting your combination sauna
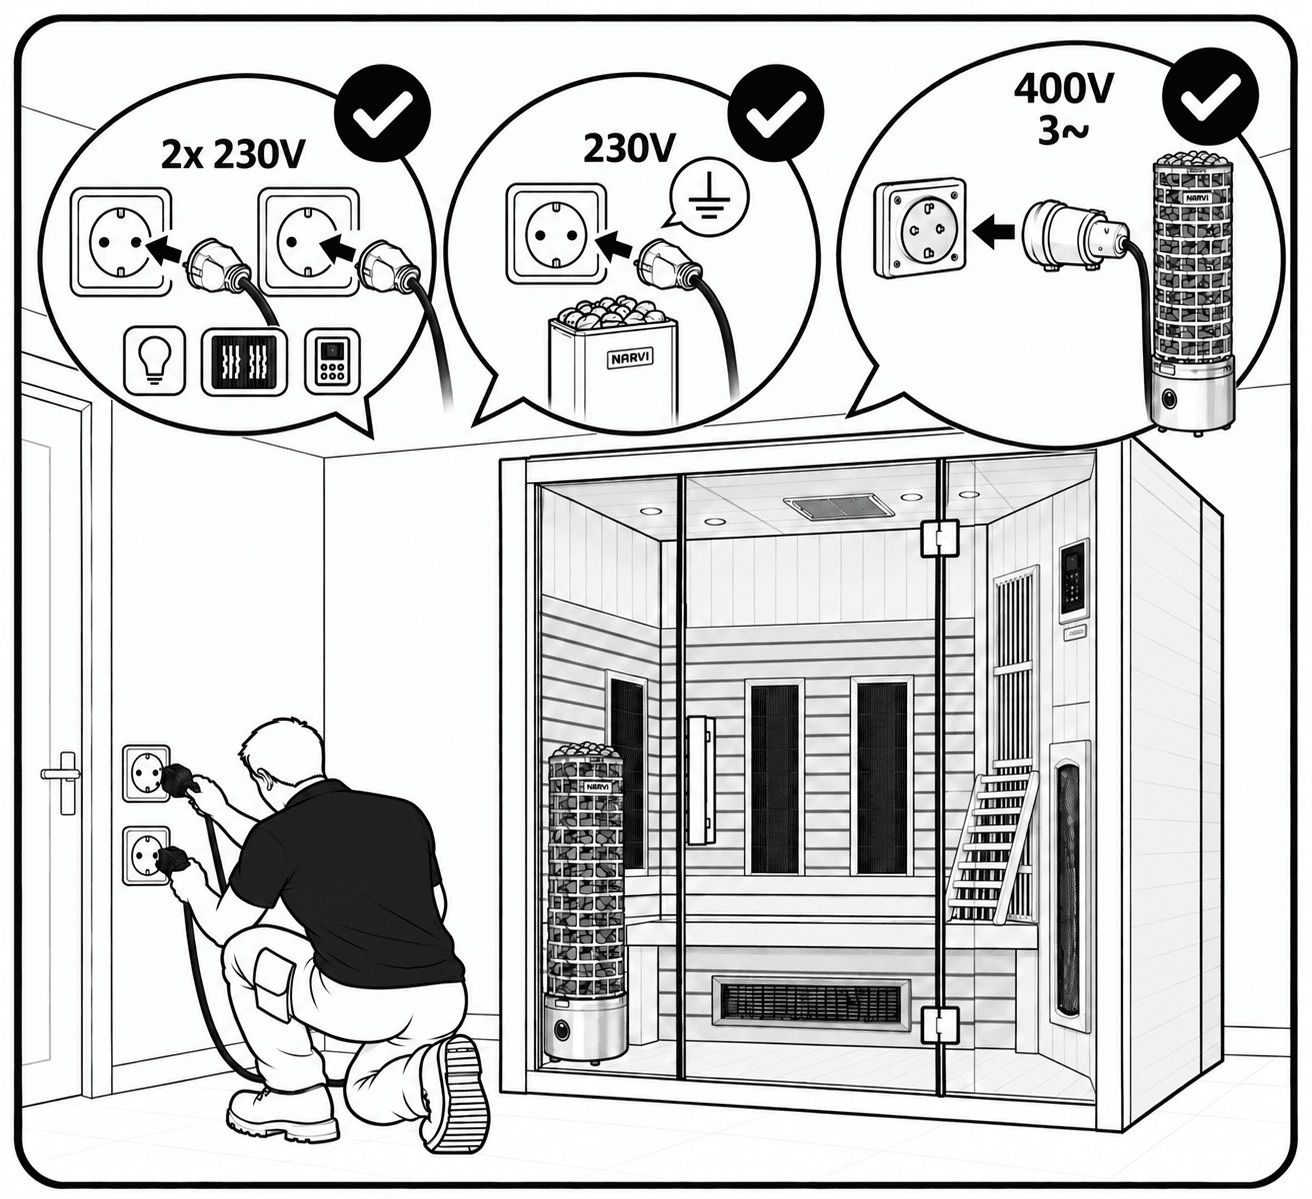
The electrical connection required depends on the model of your combination sauna. Different models are available with different electrical requirements. The infrared heaters, lighting and sauna heater may each require different connections.
Before starting the assembly, check which connections are required for your chosen sauna and heater. If a high-voltage electrical connection is required, it must be installed by a qualified electrician.
Always connect the infrared heaters, sauna heater, lighting and control panel according to the technical instructions supplied with your sauna. Also check that the correct connections and provisions are available before using the sauna for the first time.
Important points for self-assembly
During assembly, keep the following points in mind:
- Always follow the supplied assembly manual.
- Lift large and heavy panels with at least two people.
- Make sure there is enough working space around the sauna.
- Regularly check that the panels are positioned correctly during assembly.
- Use suitable tools and avoid damaging the wood.
- Make sure all electrical components are connected according to the manual.
- Follow the safety instructions for the sauna heater.
- After assembly, check that all parts are securely and correctly fitted.
- Carefully remove any stickers from the panels to avoid damaging the surface.
The exact assembly instructions may vary depending on the combination sauna. Always refer to the manual for your specific model.
After assembly
Once the sauna has been fully assembled, check that all panels, benches, backrests, the door and other components have been installed correctly.
Then check the electrical connections and the operation of the lighting, infrared heaters, control panel and sauna heater according to the manual. Any components that require a professional electrical connection must always be connected by a qualified electrician.
Before using the sauna for the first time, we recommend running it empty for 30 to 60 minutes at the highest setting. This helps remove any odours that may have developed in the materials during the manufacturing process. After this first heating cycle, ventilate the sauna thoroughly before using it for the first time.